There are plenty of store bought chicken broth options from jugs of stock, to bullion cubes, and broth concentrates. However, nothing can beat the flavor and nutrients of homemade chicken bone broth. This recipe is perfect to add to soups, stews, rice, and is delicious enough to just sip from a cup of it. Bone broth has been used for hundreds of years to improve not only gut health but overall health as well.

Chicken bone broth benefits
Gut healing
The low and slow method of cooking this broth allows the bones and vegetables to release vitamins and minerals, and the bones release collagen. Collagen is essential to a healthy gut lining so consuming collagen rich foods such as broth can help to repair the gut. Adding a high-quality collagen supplement to your routine can also help with this.
Anti-inflammatory
Homemade chicken bone broth is high in amino acids which are the building blocks of protein and are vital to overall health. They can also help rebuild muscle and reduce inflammation.
Bone and joint health
Due to the high levels of collagen, drinking bone broth can improve bone and joint health. Collagen is made by our bodies and used in the hair, skin, and nails to keep them strong and healthy, but also in the ligaments and tendons around joints.
Ingredients

Chicken bones- Chicken itself is full of vitamins and minerals, but the bones are full of nutrients as well. Slowly cooking the broth also extract the bone marrow at the center of the bones. For a thicker, more gelatinous broth add a few cleaned and uncooked chicken feet. They are so rich in collagen and add an incredible amount of nutrients to the broth.
Onion- They are nutrient dense and packed with flavor. No matter what kind of broth I am making, there are always onions tossed in.
Carrots- Full of vitamins, minerals, and antioxidants. The rich earthy flavor they impart in the broth is also fantastic.
Celery- Personally, I am not a huge fan of celery. You won’t catch me eating it with ranch or peanut butter. I don’t like the taste or the stringy texture. However, I do love adding it to broth, soups, and other things where it is cooked down and sauteed. It yields a bit of flavor without your broth having a distinct celery taste to it. It also has several vitamins as well as potassium which add to how nutrient dense your broth turns out to be.
Garlic- First of all, flavor of course. I add garlic to everything because it makes every dish just that much better. Garlic is also one of those things that is just so good for you. Adding it makes the broth more beneficial to consume. If you are like me and see food as medicine, you will also enjoy making fermented garlic honey which has become a staple in our home.
Parsley- This herb adds a natural freshness to the broth. It brings vitamins like A, C, and K, as well as brightening the flavor.
Apple cider vinegar- It might seem strange to add an acid like vinegar to the broth. It doesn’t make it taste like vinegar at all, but it does aid in pulling out the nutrients and collagen from the bones. It also has natural anti-inflammatory and digestion boosting properties.
Salt- I would add just a little bit to start and this can always be added at the end before storing or before drinking or adding to a recipe. Because the broth cooks down over time you don’t want to salt it well in the beginning and end up with a broth that is over salted by the time it cooks down. I usually add a few teaspoons and then once it is finished cooking I add it until the broth is salty enough for my preference before transferring it to jars for storage.
Seasonings- If there are other spices or flavors you enjoy, add some extra herbs. Some great options are peppercorns, bay leaves, thyme springs, rosemary, etc. If you add a lot of them, take a square of cheesecloth and place all the herbs and spices in the center and tie it off with kitchen twine. Creating a sachet like this makes it easier to pull them out at the end.
Water- You can’t make a broth without any water. But make sure it is pure and filtered whenever possible. There are many contaminates found in tap water and that isn’t something you want in your broth!
Tools
Stock pot– Ideally you want a pot that won’t leak toxins into the broth. I love using my enamel covered Dutch oven because it has plenty of room for all the ingredients.
Strainer– I recommend a metal strainer so the hot broth isn’t pulling chemicals from a plastic strainer.
Cheesecloth– This isn’t needed, but not all strainers can get out the tiny particulate and this ensures a broth free from little chunks or floaty bits. Can also be used to make a sachet for herbs and spices.
Jars– I find it the easiest to store my broth in jars because I can portion it out and store it in both the fridge and the freezer.
Funnel– These make it just a bit easier to not accidentally spill the liquid gold you just spent the last 24+ hours making.
Lets make chicken bone broth!
Essential to any bone broth- bones! These can be from a precooked chicken, like one that is whole roasted. The bones could also be from a chicken carcass that just had the meat stripped from it before cooking. They aren’t necessary but adding a few chicken feet will add more nutrients and collagen to the broth and thicken the ‘gel’. Chicken feet can often be found at a local farmers market or butcher. Whatever bones you decide to use, it is best to use organic whenever possible. The cooking process pulls so much from the bones and if the chickens were fed pesticide covered food and given hormones, that will make its way into your broth. The same goes for the vegetables and herbs.
Add the chicken bones into a stock pot.
If using whole vegetables then wash them well. Carrots and celery can be cut in thirds, then each of those cut in half. Onions can be quartered. Garlic can be lightly crushed. All these can be added into the pot with the chicken.
Add a bunch of parsley, the apple cider vinegar, salt, and pepper.
Top off with the water and cover.
Place the pot on the stove over low heat. I have 10 levels on my stove top. I keep it on 1 or simmer the entire time otherwise it cooks down too fast.
Allow the broth to simmer for 24 hours. Check occasionally to be sure it hasn’t cooked down and evaporated too much of the water. If this happens the chicken, vegetables, and herbs may burn.
Once cooked low and slow for about a day allow it to cool to a safe temperature. Strain it using a metal strainer. The strainer can be lined with cheesecloth if desired to strain out even smaller particulate.
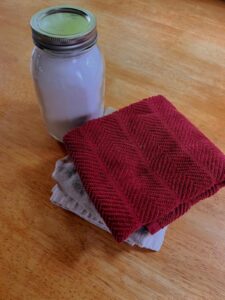
Once strained, transfer the broth into jars for storage. Keep in the fridge for up to a week, or in the freezer for 6 months. If keeping in the freezer leave two inches of space between the broth and the top of the jar. The lid should also not be screwed on super tight until the broth is fully frozen. This ensures the jars won’t break during the freezing process.
Enjoy!
How to make it with scraps
If you want to use up vegetable scraps you can! This means using onion skins, carrot tops, and the tops and leaves of celery. It is a great way to use up scraps and lower food waste.
If you know you are going to be preparing chicken bone broth you can start saving up scraps in the fridge for a week or so, or even keep them in the freezer so they last longer. I always make sure anything that is going in my broth has been washed very well so I am not adding germs, pesticides, dirt, or anything else into the pot.
I am very comfortable adding all of the parts of an onion or carrot to the broth. The only part of the celery that I don’t add is the very base. If there are parts that are bad, or rotten, cut those off, but otherwise they are good to add.
You can either add enough scraps to equal the amount in the recipe, or just add the scraps in addition to what the recipe calls for. Either way it is a great way to use up scraps and add nutrients to your broth!
Frequently asked questions

How to reheat the broth?
I never ever recommend using a microwave for anything, but especially things like broth that are so nutrient dense. It can be added directly to a recipe, or gently heated on the stove in a small pot.
Can it be made ahead of time?
Yes! Because it does take so long to cook it is something that can’t just be whipped up right before using it in a meal. I prefer to have a few jars in the freezer just incase I ever run out of fresh broth and don’t have time to make more.
How do I know if its cooked enough?
I usually go for a time. It will taste great after 12 hours. However, I like giving it that extra 12 to make sure all the nutrients are extracted and the collagen is pulled from the bones.
I have heard of people using an Instant Pot, can I do that?
Broth needs to be cooked low and slow to get all the healing properties and nutrients from the ingredients so I do not recommend using and Instant Pot.
I don’t feel comfortable keeping my stove on all night because of the open flame from my range.
I personally haven’t ever made broth in a slow cooker but you most certainly can. Add all the ingredients to a 6-quart slow cooker and cook on low for at least 12 hours. I still recommend the full 24, but if you want a shorter cooking time, a slow cooker is the way to go.
Is it bad if my broth didn’t “gel”?
No. Depending on what bones you use and how much water evaporates will determine how thick your broth gets. If you don’t boil it down as much it may not gel. If you don’t add chicken feet, it isn’t as likely to gel. Precooked chicken bones won’t always produce a broth that gels because some of the collagen has already been cooked out. If you do use a precooked chicken, like when making a whole roasted chicken, be sure to add all the juices from the bottom of the pan into the broth.
What can I do with it other than add it to a recipe?
Because it is so nutrient and flavor dense it makes a great sipping broth. This can be done at anytime, but during sickness is my favorite time to pull out homemade broth. It is a great way to stay hydrated when having a fever or if you have a stomach bug. If you can keep down water, try sipping a bit of warm broth. If having it on its own, feel free to add more salt or spices to taste.
There is fat that rose to the top of my broth, what do I do with it?
Thats totally fine! This happens as the broth cools, it will float to the top. You can scoop it off and discard it, or keep it in the broth when you heat it up or add it to a recipe!
This bone broth is rich in nutrients, flavor, and healing properties. It is incredibly simple and can even be made mostly from scraps. It is rich in collagen and is perfect for soups, stews, rice, or even just to put in a mug and sip on.Homemade Chicken Bone Broth

Ingredients
Instructions
Notes
If you found this post helpful or enjoyable, please share it with friends and family. It is a huge help and helps me keep the blog going. Thank you so much!
Leave a Reply